Can I buy replacement burners?
Yes. These can be purchased through any retail outlet which sells Heatlie products.
Can I have the burner made in stainless steel?
All Roasters now come with a stainless steel burner. These burners may warp upwards when it is heated, as stainless steel has more movement than mild steel but this will not affect the cooking.
The Pilot is too small. Can it be adjusted?
Yes. Firstly remove burner from roaster.
- Check that there are 3 individual flames coming out of the 3 port pilot light. One faces the electrode, one faces the burner, and the other faces the thermocouple, and should all be of equal size if not this means there is an obstruction in one of the ports.
- The flame should be large enough to encase the tip of the thermocouple. If not, tip burner upside down, and on the base of the pilot light there is a hexagonal cap with a screwdriver slot. (ensurethe pilot light is not on for this procedure.)
- Remove the hexagonal cap where you will find another screw driver slot, this one is brass.
- Turn this slot anti-clockwise a couple of degrees only. Then replace the cap, turn burner back over and re-light the pilot light. This should have increased the size of the flame. If it is still not big enough, repeat this process until it is.
- The flame must remain blue, if it turns orange it can cause soot build up on the thermocouple and will cease to function properly.
The pilot light is Yellow. What does this mean?
The pilot should be blue. The yellow flame means there is possibly an obstruction in the pilot light.
- Firstly, remove the stainless controller cover by undoing the screws holding it on. The igniter is attached to this cover, so you will need to detach the piezolead first. (don’t forget to re-attach it later)
- Remove controller cover and controller from the end plate of burner which is held on by two nuts and bolts.
- Undo the two brass screws at the end of the pilot light assembly which hold on the clamping bracket.
- The cover part of this assembly will not come apart. Rotate the pilot assembly out from behind the cover to access. The pilot light assembly should now be visible.
- Remove the two hex headed slot screws that hold the pilot assembly together, (be careful as this is where the item mayfall apart) You can now separate the pilot light components to individually look at and check to see that there is no obstruction anywhere.
- The middle part of the bracket is the pilot light (with a mushroom looking top on it) Take the mushroom and stalk part out, check inside the mixing chamber (mushroom stalk) for obstructions. Look for grease, or insects or something small that has made its way into this chamber. Remove any foreign objects, clean any grease away. Blow out with compressed air if possible. If you fail to find anything foreign, the pilot light will need to be replaced.
How do I care for my Heatlie Roaster?
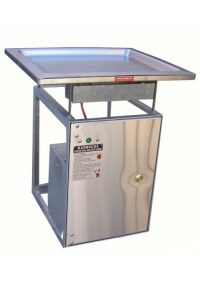
A removable liquid collection container slides directly underneath the drain hole, allowing collection and easy disposal of fat.
The base of the oven can be lined with foil which can be easily removed after cooking and disposed of. Foil trays can also be used in the base and disposed of after use. The burner is able to be removed easily, enabling the oven to be steam cleaned.
The outside of the oven can be cleaned with any commercially available stainless steel cleaning products.